Layered material
- Create a Layered Material
- Create a Material (just a standard material)
- Lets call it M_layered
- Open up the material
- Set the material to use Material Attributes
- Material > Use Material Attributes : Enabled
- Create a Material Attributes Layers node
- Connect the output (of the Material Attributes Layers) to the input of the material result node
- Create a Material (just a standard material)
- Create a Material Layer
- RMB click > Material > Layers > Material Layer
- Lets call it ML_vertex_color
- Open up the material layer
- On the Set Material Attributes add 5 attributes
- Click the + button and add:
- BaseColor
- Metallic
- Specular
- Roughness
- Normal
- Click the + button and add:
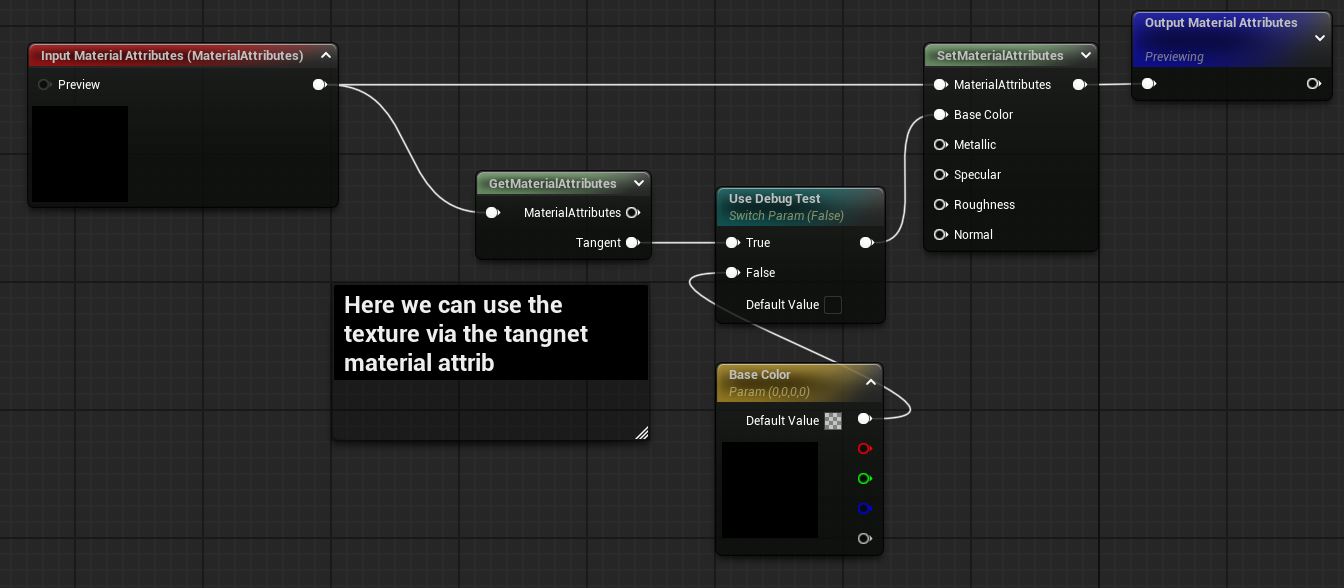
- Create your material setup and connect to the PBR attribute inputs we just created
- in our test case we will expose the Base Color so that we can set the color with a vector parameter
- Create a Material Layer Blend
- RMB click > Material > Layers > Material Layer Blend
- Lets call it MLB_vertex_color
- Open up the material layer blend
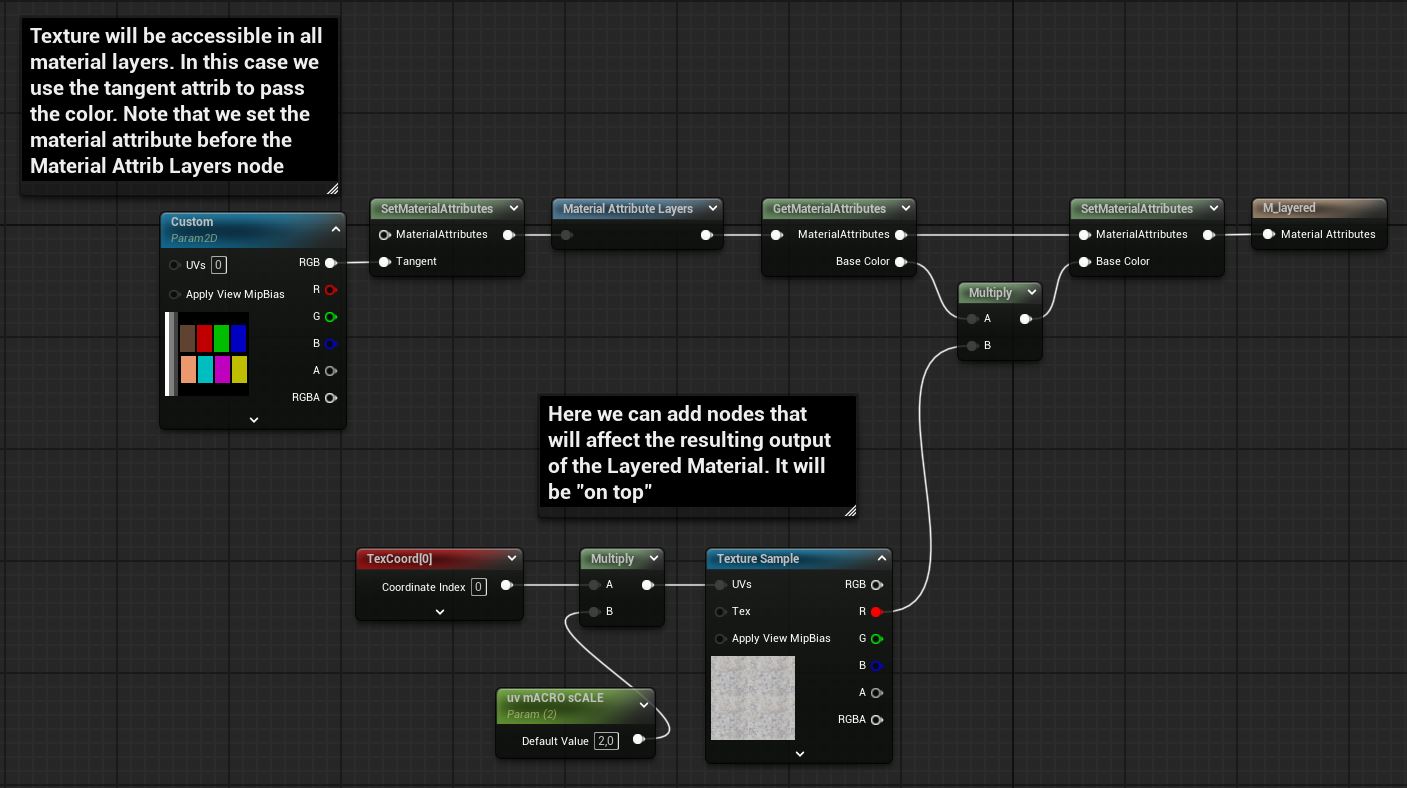
- Lets add functionality for the user to use vertex colors and ability to select which channel to use
- Create a Vertex Color node
- Create a Append Vector node
- Connect the RGB output (the top white outout) from the vertex color node to the A input of the Append node
- Connect the Alpha (at the bottom) output to the B input of the append node
- We do this since we want the ability to choose RGBA in the channel mask parameter
- Create a Channel Mask Parameter node
- Name the parameter Vertex Color Channel
- Connect the output of the append node to the input of the channel mask parameter node
- Connect the output of the channel mask parameter node to the Alpha input of the Blend Matwerial Attributes node
- Create a Layered Material
- Create the Layered material Instance
- Create a Material Instance of the M_layered material
- Call it MI_layered
- Open it up
- In the Layers Parameter tab you can see the layers
- If it is not visible, Window > Layer Parameters
- On the + button next to the Material Layers click to add as many layers as you need
- In this example we will add 3 layers
- Add layer instances
- Create Material Layer instances
- RMB click on the Material Layer > Create Layer Instance
- In our example we will create 3 layers, “red, green and blue”
- Call the instances MLI_red, MLI_green and MLI_blue
- Change the Base Color so they reflect the names
- Drag and drop the material layer instances on the slots in the MI_layered Material instance
- Create Material Layer instances
- Add blend assets
- If you have more than one layer (which you will) then you will see an input called Blend Assets
- This controls how the material layers blend
- Create an instance of the Material Layer Blend asset
- Call it “MLBI_vertex_color”
- Drag and drop the asset on the Blend Asset in the layered material (MI_layered)
- Expand the properties and set the and set which vertex color channel that should be sued for each layer
- Done!
- Create the Layered material Instance
Tips
How to
Translucency & refraction (PBR)
- Create a translucent, refractive material in UE 5.2
- RMB Content browser > Material
- In details panel
- Material > Blend Mode : Translucent
- Translucency > Lighting Mode : Surface Translucency Volume
- Refraction > Refraction Method : Index Of Refraction
- Then you can use the common texures or paramers to control the material
- Note
- One big gotcha if you want to use a mesh that you apply an emissive material to to emulate a light source and position that behind the refractive material (like if you create a headlight etc) is that the scale of the mesh needs to be set to 1. If the scale is really small and the camera moves to far away from the refractive material Unreal will “cull it” so that the emissive object will no longer be refracted as you would expect.
- Fog/lightshaft artifacts
- I needed to set the Translucency > Advanced > Translucency Pass to Before DOF to get rid of some articats when the refractive material had lightshaft fog in fornt of it
- Tweak the IOR
- I had an issue where the headlight glass did not refract the emitted light the way I artistically wanted, so altough not physically correct but to get the look that I wanted, I lowered the IOR to something like 1.05 or slightly higher.
- Epic docs
PBR
- Base Color
- Real world materials are not darker than 20 srgb or brighter than 240 srgb
- Rough surfaces have a higher minimun, around 50 srgb
- Out of range values will not light correctly, so staying in range is critical
- On a non-metallic material this controls the diffuse
- On a metallic material this controls the specular
- On a metallic material the diffuse is black
- Specular
- A multiplier for the direct and indirect specular lighting
- Defining the reflectivity when looking straight at the surface
- Non-metal surfaces reflects about 4% of the light
- Specular value:
- 0.5 represents 4% reflection
- 1.0 represents 8% reflection (to high for most materials)
- At glancing angles all surfaces are 100 % reflective
- The fresnell term is built into the engine
- Specular maps should mostly be at 0.5
- Only use lower values to mask areas that should not be reflective like crevices
- A crevice map multiplied with 0.5 makes a good specular map.
- Roughness
- Represents the roughness of the surface at a microscopic scale.
- White is rough and black is smooth
- Controls the focus of reflections
- Smooth = tight, sharp reflections
- Rough = blurry, diffuse reflections
- No technical constraints - completely artistic choice
- A roughness map can be used to define the “character” of the surface and show its history
- Metallic
- Switches the shader to metallic mode
- When the metallic is set to 1 (a metallic material)
- Now the base color controls the specular of the material
- Now the specular range is up to 100%
- Most metals are between 60-100% reflective
- Be sure to use real-world measurements for metal “base color”
- Metals have colored reflections
- The values should be around 180 srgb or brighter
- The base color controls the specular
- The specular parameter is ignored (since it is controlled by the base color)
- The diffuse is always black
- Values of either 0 or 1 should be used.
- Values in between should be avoided since that will produce a weird mix of non-metal / metal behaviour
- A few pixles of “inbetween values” where a map transitions from 0 to 1 are ok, but generally the map should be 0 or 1
- Ambient Occlusion
- Only used if we use a baked gloabl illumination solution.
Landscape
- Material Attributes
- on the result node of the material click Details > Material > Use material Attributes : On
Nodes
Math / Misc
- Mask - [math] componentMask
- Selects a specific subset of channels (R, G, B, and/or A)
- Split Components - [Misc] splitComponents
- Can split out components of a vec3. (Can not output alpha vec4)
- Append - [Math] appendVector
- Construct a vector with more channels than the original. You can appen to floats to create a vec2 or one float and a vec2 to cfreate a vec3.
- AppenMany - [Misc] appendMany
- Allows you to append up to 4 scalars in one function
- Swizzle - [Misc] swizzle
- Can rearrange the components of a vector
Textures
- Dropping one resolution step reduces memory 4 times.
- Using 4k textures is very expensive
- Uncompressed textures need to be at a low resolution, otherwise they will require alot of memory.
- Using a alpha channel doubles memory usage, since the alpha channel are stored at a higher quality
- Therefore if you pack channels you should pack the channel that needs the best quality in the alpha.
Compression
- Optimization
- Reduce in game texture size
- texture editor > details tab > compression > advanced
- Set the maximum texture size to the size you want
- Note that a value of 0 will use the original size
- Compress without Alpha
- If your texture has an alpha channel but you do not need it you can make the editor skip the alpha
- This will reduce the size by half
- texture editor > details tab > compression
- enable Compress without alpha
- Reduce in game texture size
Samples
Experiments
Material Functions
MF_UvTransform
Ctrl-C
A material function that is used to transform UVs. Based on Ben Cloward´s work
MF_Hash2to3
Ctrl-C
A material function that generates pseudo random vec3 noise seeded by a vec2. Based on Ben Cloward´s work
MF_UvRandomTransform
Ctrl-C
A material function that generates random UV transform, rotation & scale. Based on Ben Cloward´s work
Requires: ( 2 ) MF_UvTransform, MF_Hash2to3
Requires: ( 2 ) MF_UvTransform, MF_Hash2to3
MF_HexGrid
Ctrl-C
A material function that generates a hex grid that can be used to tile textures without repetition. Based on Ben Cloward´s work. (Note to self, look into the Epic Matrix city demo for a material function called MF_Cellbombing