Blender
Intro
Modelling
Modifiers
It is finally time to start exploring Blender. I have had this on my todo list for a long time but there were alot of other things to focus on first.
Here is a nice Blender Fundamentals 2.8 playlist
Config
The blender config is located here:
C:\Users\your_name\AppData\Roaming\Blender Foundation\Blender\2.83
To reset all config simply rename or delete the folder (the version you want to reset)
Regions
Every Editor in Blender is divided into Regions (docs). Regions can have smaller structuring elements like tabs and panels with buttons, controls and widgets placed within them.
- Header : green
- RMB click on a header reveals a context menu with a couple options.
- A Header is a small horizontal strip, which sits either at the top or bottom of an area. All editors have a header acting as a container for menus and commonly used tools. Menus and buttons will change with the editor type and the selected object and mode. header (docs)
- 3D View / Main region : yellow
- Toolbar : blue
- Toolbar (Read more)
- Sidebar : red
- Sidebar (Read more)
- Adjust Last Operation panel : pink
- F9
Panels
- Editor type
- To change the editor type LMB click the top left corner of a panel and select an editor from the popup widget.
- Create new area
- Move the mouse pointer to the upper right area of a view. When the cursor changes to a cross (+) drag inwards (to the view) to split the view.
- You define the split direction by dragging either horizontally or vertically.
- If esc is pressed while the mouse is still held down the actiuon will be aborted
- Hover the mouse over the border of an area and when the mouse pointer becomes 2 arrows RMB > Horixontal or Vertical split.
- Move the mouse pointer to the upper right area of a view. When the cursor changes to a cross (+) drag inwards (to the view) to split the view.
- Close (join) area
- Move the mouse pointer to the upper right area of a view. When the cursor changes to a cross (+) drag outwards (from the view to the one you want to join into) to join the view.
- If esc is pressed while the mouse is still held down the actiuon will be aborted
- Hover the mouse over the border of two area RMB > Join and drag the mouse in the direction to join.
- Move the mouse pointer to the upper right area of a view. When the cursor changes to a cross (+) drag outwards (from the view to the one you want to join into) to join the view.
- Swap area
- Hover the mouse over the border of two areas RMB > Swap
- Maximize panel
- Ctrl Space
- Workspaces
- The default workspaces are lokated as tabs in the top of the UI
Scene
In Blender a single file can contain multiple scenes. At the right hand side of the main menu there is a widget labeled Scene where you can create a new, select and existing or copy a scene.
View Layer
On the right hand side of the scene widget (in the main menu bar) you will find the View layer widget.
Outliner
In the outliner we can use collections to control how our objects are displayed in the current view layer.
Collections
Collections allows use to structure oure scene for organization or render layer purposes. Each collection can hold object of any kind, including other collections. Altough it is possible to ling objects to multiple collections it might lead to confusion. It is better to organize it some other way. If a collections is deleted the objects inside will not be deleted, they are moved outside.
The eye icon (on the left side) will not affect the render, but will hide objects in the viewport.
There is a filter icon in the top right corner of the collections panel that will give options such as setting objects as non selectable and more.
- Move to collection : M
- RMB > Move to Collection (object needs to be selected)
- Solo Collection
- 1 - 9 (not the numpad)
- Ctrl LMB click the eye icon in the outliner (Toggles)
Properties Editor
In the default layout the properties editor is located under the outliner. The properties editor has a vertical tab layout. If you look closely the tabs are seoarated into 4 different sections (there are a slightly larger gap between them)
Starting from the top:
- Active tool
- Active Tool & Workspace settings
- Scene specfic
(scene)
- Render Properties
- Render engines, sampling, engine specific properties etc.
- Output Properties
- Resolution, framerate, file path, file type etc.
- View Layer Properties
- i.e. Render layers. Note that this operates on the current (view layer)
- Scene Properties
- Misc scene settings like cammera, rigid body settings etc
- World Properties
- Set the the sky/air material/shader, volumetric lighting, mist/fog options.
- Render Properties
- Active (selected) object
- Object Properties
- Parent/child settings, transform, visibility, collections etc
- Modifier Properties
- Add/edit/organize modifiers
- Particle Properties
- Create/edit Particle systems
- Physics Properties
- Create/edit various sims, like rigid body, cloth, smoke etc.
- Object Constraint Properties
- Create/edit various constraints
- Object Data Properties
- i.e. shape properties. Mesh, camera, lights etc.
If a mesh is selected: vertex, normals, uv attrs. If a camera is selected camera related shape properties like lens, depth of field. If a light is selected intensity, dropoff ect.
- i.e. shape properties. Mesh, camera, lights etc.
- Material Properties
- Material related settings
- Object Properties
- Textures
- Texture Properties
- Note that this is not object specfic since it can be referenced by multiple objects/materials/brushes etc.
- Texture Properties
General
Modes
- Toggle Object/Edit mode : Tab
- Modes
- Object Mode
- Edit Mode
- Sculpt Mode
- Vertex Paint
- Weight Paint
- Texture Paint
Object Mode
Parenting
-
Parent : Ctrl P
- Object
- Object Parent is the most general form of parenting that Blender supports. If will take selected objects and make the last selected object the Parent Object, while all other selected objects will be Child Objects.
- Object (Keep Transform)
- Works in a very similar way to Object Parent the major difference is in whether the Child Objects will remember any previous transformations applied to them from the previous Parent Object.
- The child object will keep its transform in relation to the parent
- You can remove the child transform offset by: Alt P > Clear Parent Inverse
- Object (Without Inverse)
- Parents the objects but does not keep the child object transform.
- You can hide the relationship lines from the Vieport Overlays menu.
- Object
-
Unparent : Alt P
-
Or use the Object > Parent menu
3D View
Contextual Views
The 3D Viewport has several “contextual view” modes that can be set for a particular 3D Viewport. These views can change how the overall 3D Viewport looks or how you interact with objects.
- Global view
- Shows all of the 3D objects in the scene.
- Local view
- Toggle Local View: / (division key numpad)
- Remove selected object from local view: M
- Isolates the selected object or objects, so that they are the only ones visible in the viewport. This is useful for working on objects that are obscured by other ones, or to speed up the viewport performance in heavy scenes.
- Also accesible through View Menu > Local View > Toggle Local View
- Quad View
- Toggle Quad View : Ctrl Alt Q
- Split the 3D Viewport into four views: Three Orthographic “side views” and one Camera/User View.
- When Quad View is enabled the options below will be visible in the Sidebar > View > Quad View
- Lock
- If you want to be able to rotate each view, you can uncheck the Locked option.
- Box
- Syncs the view position between side views. (Requires Lock to be enabled.)
- Clip
- Clip objects based on what is visible in other side views. (Requires Box to be enabled.)
- Lock
Orthographic
Below is the shortcuts for setting the orthographic views. Note that they are set with the numpad
- Orthohgraphic
- Front - Back : 1 - Ctrl 1
- Top - Bottom : 7 - Ctrl 7
- Right - Left : 3 - Ctrl 3
If we hold shift and use the same shortcuts we can align the view with the active.
- Align view to active
- Front - Back : Shift 1 - Shift Ctrl 1
- Top - Bottom : Shift 7 - Shift Ctrl 7
- Right - Left : Shift 3 - Shift Ctrl 3
Camera
Here is the docs for the camera view and here is the docs for the camera object.
- Look through active camera (toggle): 0 (numpad)
- Set Active Object as Camera : Ctrl 0 (numpad)
- Note: the active object might be any kind of object. So these actions can be used, for example, to position and aim a lamp.
- Move Active Camera to View : Ctrl Alt 0 (numpad)
- To lock the camera to the current view : Sidebar > View > View > View Lock > Lock Camera to View.
We can create our own camera and switch that to an orthographic camera if we want.
- Custom Ortho Camera
- In object mode Shift A > Camera
- Select the camera and go to the Object data Properties tab
- Set the Type > Orthographic
- Change the orthographic scale to change what is visible in the view.
- Rotate/move as needed
Display / Shading
- Backface culling
- This is enabled through the Shading menu top right side of the 3D view.
- Wireframe on shaded
- Viewport overlays menu (right hand side of the 3D view header)
- Geometry > Wireframe
- Per object : Properties Editor > Object Properties > Viewport Display > Wireframe
- Viewport overlays menu (right hand side of the 3D view header)
- Toggle X-Ray : Alt Z
- The X-Ray opacity can be set in the viewport shading menu (in the 3D view header, right hand side of the shading type buttons)
- Toggle Wireframe / Shaded mode : Shift Z
- Toggle Overlay : Shift Alt Z
Viewport Shading
The Workbench engine is a render engine optimized for fast rendering during modeling and animation preview. It is not intended to be a render engine that will render final images for a project. Its primary task is to display a scene in the 3D Viewport when it is being worked on.
The Workbench engine does not use the lights of the scene. The lighting conditions that will be used can be set in the Lighting panel.
- Lighting Flat * Do not calculate any lighting. The base color of the scene will be rendered. Studio * Use studio lights to light the objects. The studio lights can be configured in the preferences. Studio lights can follow the camera or be fixed. When fixed the angle of the lights can be adjusted. * World Space Lighting * Uses world space lighting so lights do not follow the view camera. * Rotation * The rotation of the studio lights on the Z axis. MatCap * Use a material capture to light the objects in the scene. * Custom MatCaps can be loaded in the preferences. * MatCaps can be flipped horizontally by clicking the Flip MatCap button. * Click on the “shader ball” to change matcap.
Hide
- Hide
- Hide Selection : H
- Unhide All : Alt H
- Hide Unselected : Shift H
- Note that the hide command temporarily hides objects in the viewport (i.e. what you toggle with the “eye-icon” in the outliner). It will not have an effect of objects whos visibility have been disabled globally by the “monitor-icon” (which you have to enable through the fileter menu in the outliner)
Normals
- Display normals
- In the bottom of the Vieport Overlays menu we find options for displaying normals. We can set the size ond choose to display:
- Vertex normals
- Split normals (vertex per face normals)
- If the mesh is set top smooth shaded and we display our split normals our vertex normals are all pointing in the same direction so it looks like we have only one normal but in fact we have a normal per vertex. If we set the shading to hard we will clearly se that we have a normal per vertex.
- Normals (face normals)
- In the bottom of the Vieport Overlays menu we find options for displaying normals. We can set the size ond choose to display:
- Flip Normals
- Alt N > Flip
- Recalculate Normals : Conforms the normals of the selected faces so that tey all points in either outside or inside of the mesh.
- Alt N > Recalculate Outside
- Alt N > Recalculate Inside
Smooth / Flat
You can choose to shade smooth or flat both in object- and edit mode. Note if we select a few faces in edit mode and set to smooth shaded, then we go out to object mode select the mesh and set to flat shaded it will set hard shaded on all of the faces in the mesh (i.e. “overwrite what we set in edit mode”)
Here is an example of how we can use auto-smooth and sharp edges to control the behaviour of our normals.
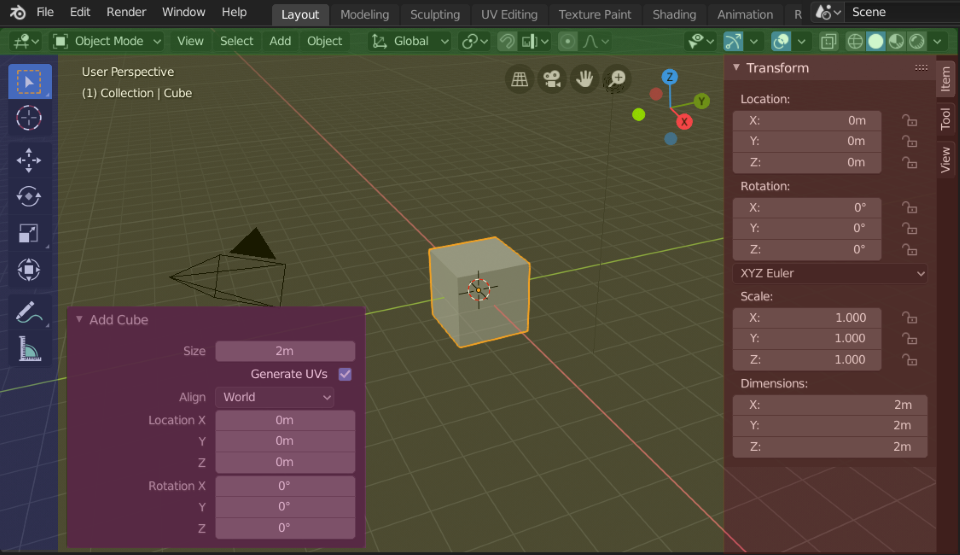
- Create a cube
- With the cube selected in the properties editor > Object Data Properties > Normals > Auto Smoth : On and set the angle to 180.
- In object mode with the cube selected RMB > Shade Smooth
- Go in edit mode and display the split normals (Viewport overlays menu)
- We clearly see that our per face vertex normals are averaged together and all points in the same direction.
- Drag the Auto Smooth Angle below 90 degress and you can clearly see when the normals stop avereging and the mesh faces shades as flat.
- Turn the angle back up to 180.
- Select some of the edges and RMB > Mark Sharp and you will notice the same effect. This way we can explicitly control which edges should render as sharp vs smooth.
- Tips
- You can toggle the display of the sharp edges in the vieport overlays menu
- In edit mode we can select edges based on the angle between its faces.
- Select > Select Sharp Edges (the sharpness controls which edges are considered sharp)
- Then we can set mark the selected edges as sharp.
Toolbar
The Toolbar ( T ) is located in the top left corner of the 3D view.
- Tweak & Select W will cycle the tool
- Tweak
- Select Box
- Select Circle
- Select Lasso
- Hold Shift to add to selection
- Hold Ctrl to subtract from selection
- Cursor
- Move
- Rotate
- Scale
- Scale
- Scale Cage
- Transform (Gizmo)
- Annotate
- Annotate Line
- Annotate Line
- Annotate Polygon
- Annotate Eraser
- Measure
Pop-up
Shift Space Displays the tools at the mouse position. With the key shortcut still pressed we can move the mouse pointer in the list and release the shortcut to select the tool. With this menu open you can also use the shortcuts presented at the end of each tool in the menu. NOOOTE lest change this keymap to SPACE only.
Sidebar
The Sidebar is located on the right side of the 3D view. This panel contains the transform attributes of the selected item, settings of the editor itself and more.
- Sidebar :
- Toggle the menu : N
- The Transform attributes of the selected item can be found in this menu aswell as other tool & view settings.
3D Cursor
The 3D Cursor is used as the origin for any added object. It can be used and moved with the snap tool. It can be used as an option for the pivot point.
- Numerical transform
- In the Sidebar menu: view > 3D cursor
- Position The 3D cursor
- Shift RMB
- With the cursor tool selected LMB
- Surface Project
- With the cursor tool selected, there are options in the header bar
- Surface Project
- Orientation : Geometry
- Note the surface project and orient only seems to work when the cursor tool is activated not with shift RMB.
- With the cursor tool selected, there are options in the header bar
- Snap to Verts
- start dragging the cursor and press and hold Ctrl will snap to verts.
Measure
- Snap to Edges & verts
- start drag and then press & hold Ctrl
- Measure thickness
- start drag and press Shift
- Measure angle
- LMB click in the middle of a measurement to measure angles
Selection
- Select
- Select All : A
- A can also be set to toggle selection in the prefs
- Deselect All : Alt A
- or AA
- Invert : Ctrl i
- Select All : A
- LMB click
- By holding Shift we can click objects to add to our selection.
- The last item clicked will have a brighter orange color to indicate it is the active object.
- Not that when holding shift and clicking on the active object it will be deselected.
- This means that if we have multiple objects selected and we wish to Shift LMB deselect an object that is not the active one, when we first click it it will become the active then click again to deselect.
- List of objects under mouse : Shift Alt LMB
- Select Pie Menu : Alt W
- Select Box (Toolbar)
- Shift to add
- Ctrl to remove
- Select Circle (Toolbar)
- Shift to add
- Ctrl to remove
- Select Lasso (Toolbar)
- Shift to add
- Ctrl to remove
- We can also press B to get into another type of box select tool
- In this tool we do not need to hold shift to add to selection
- MMB drag will remove from selection
- We can also press C to get into another type of circle select tool
- In this tool we do not need to hold shift to add to selection
- MMB drag will remove from selection
Select menu
There is a select menu in the top of the 3D view that has som nice options, some of which are:
- Checker Deselect
- Select Sharp Edges
- Select Similar
- Normal
- Co-planar
- …
- Select by trait
- Non Manifold (vertex & edge mode)
- Loose Geometry
- Is a good to tool to use when cleaning up loose edges and verts.
- …
Transformation
Options
The affect only menu is located in the right hand side of the 3D View header and in the sidebar > Tool > Options > Transform
- Affect only
- Origins : Pivots
- Locations : Move, rotate & scale the location only. This will affect only where the location is but leave the rotation and scale of the object as it is. This means that if we scale up using this the objects will get further appart but keep the same scale.
- Parents : Move parent, leave child stationary
You can use the shortcuts below to transform an object. We can of course also use the toolbar transform gizmos.
- Grab (Translate)
- Grab : G
- Reset : Alt G
- Rotate
- Rotate : R
- Reset : Alt R
- View/Free toggle : R (again)
- Scale
- Scale : G
- Reset : Alt S
Constrain to Axis
If we want to constrain the translation, rotation or scale along a specific axis we can press X, Y or Z. If we press the X, Y or Z twice in a row we will contrain the movement along the local space of the object.
- Axis : X, Y or Z
- Plane : Shift X, Y or Z
- If we want to transform on the XY plane -> Shift Z
Numerical
If you want to move a specfic amount you can use the keybord. Lets say that we want to translate 2 units in the x-axis.
- G X 2
- Translate 2 units along x-axis
- S Z 0
- Scale the selected components to 0 along the z-axis
Snap
If we hold Ctrl while transforming we will snap using the options set in the snap dropdown (Ctrl Shift Tab) even if the snap is off. You can also toggle snap on/off with Shift Tab. If the xform was initiated with shortcut (G,R,S) the snap icon will not update until the transform is done, but it will toggle the snap.
Transform Orientations
- Transform Orientations : , (comma key)
- Global
- Local
- Normal
- Gimbal
- View
- Cursor
- Also found in dropdown menu in the center of the 3D View header bar
- Custom Orientation
- We can add a custom orientation by selecting a component (vertex, edge & face) or an object and in the Transform orientation menu press the + button.
Pivot / Location
- Pivot Point Menu: . (period key)
- Bounding Box Center
- 3D Cursor
- Individual Origins
- Media Point
- Active Element
- Also found in dropdown menu in the center of the 3D View header bar
- Scale & Rotate the Location (pivot)
- This can be handy if we want to change the position of the object location but leave the scale and rotation of the objects intact. We do this by enabling Affect Only Locations and use a pivot options other then invividual origins we will scale, translate and rotate the origin itself without affecting the rotation or the scale of the object itself.
- Tips
- For quick access to change the origins (pivot) of an object I have set the insert key as a shortcut for toggling the Origins box of the Sidebar > Tool > Options > Affect Only > Origins.
- Note if we have enabled the affect only > Origins and we do a Alt G to reset the location to the origin the object stays in place and only the origin is move to world origin. If it is unchecked both the object and its location is moved.
- Align the 3D cursor to the midpoint of a selection Shift S > Cursor to Selected
- Snap the location (pivot) to the 3d Cursor there is a menu in object mode Object > Set Origin > Origin to 3D Cursor
- For quick access to change the origins (pivot) of an object I have set the insert key as a shortcut for toggling the Origins box of the Sidebar > Tool > Options > Affect Only > Origins.
Snapping
- Snap Settings
- Increment
- Vertex
- Edge
- Face
- Volume
- Edge Center
- Edge Perpendicular
- Absolute Grid Snap
- Must be enabled for grid snap
- Toggle Snapping : Shift Tab
- Snap Menu : Ctrl Shift Tab
- Snap Pie Menu : Shift S
- Snap Menu : RMB
- Both in Object & edit mode
- Also found in dropdown menu in the center of the 3D View header bar
- Add Snap Points : A
- If you press A while you are snapped to a specific feayure you will add a “snap point” there. You can add multiple snap points. If you move the cursor away from the snapping destination the object will snap to the center of the added snap points.
Proportional Editing
- Proportional Editing / aka Soft Select : O
- Edit the radius -> You must press Page Up/Page Down or use the scroll wheel during a transform action such as Translate (G), Rotate (R), or Scale (S).
- Also found in dropdown menu in the center of the 3D View header bar
Preferences
Here are some of the preferences that I changed to fit my workflow (Maya/Houdini background). I have listed the value of the preference I have set in bold and the default state in parantheses.
- Blender Preferences
- Navigation
- Orbit & Pan
- Auto Perspective: On (On)
- Automatically switch between orthographic and perspective when changing from top/front/side views.
- Auto Depth: On (Off)
- Use the depth under the mouse to improve the view pan/rotate/zoom functionality. For example: rotate around the object under the mouse pointer.
- Auto Perspective: On (On)
- Zoom
- Zoom Axis: Horizontal (Vertical)
- Axis of movement to zoom in or out. I think it should be an option to just use the length of the postion delta here. (I think Houdini uses this?)
- Zoom To Mouse Position: On (Off)
- Zoom into the mouse pointer position in the 3D view instead of the 2D window center.
- Zoom Axis: Horizontal (Vertical)
- Orbit & Pan
- Keymap
- Preferences
- Spacebar Action : Search (Play)
- Select All toggles: On (off)
- 3D View
- 3D View (Global)
- Rotate View: Alt LMB (MMB)
- Pan View: Alt MMB (Shift + MMB)
- Zoom View: Alt RMB (Ctrl + MMB)
- Frame Selected: F (numpad .)
- 3D View (Global)
- Preferences
- Navigation
Some additional prefs
- Blender Preferences
- Themes
- 3D Viewport
- Vertex Size: 3 px (3 px)
- 3D Viewport
- Themes
Todo
- Todo
- Might use alt x for snap menu
- Might use x for toggle snap
- insert > origins !
- wireframe > quickmenu ?
Misc
UI
- Scroll long menus: MMB
- RMB click on parameters
- Assign Shortcut
- Add to Quick Favourites
- Edit properties of multiple selected objects hold Alt when editing the value. In the Sidebar (N-panel) to change the scale of all axis hold Alt, LMB drag to select all axis enter value manually or drag to set the scale “interactive”.
Shortcuts
- Search : F3
- File Menu (& prefs) : F4
Command Line
cd c:<blender installation directory>
You can also add the Blender folder to your system PATH so that you do not have to cd to it each time.
blender --background "C:\path\to\3d_file.blend" --render-output "C:\path\to\output" --render-frame 1
Add-ons
To install add-ons
- Edit > Preferences > Add-ons > Install (at the top)
- Browse to the zip archive and select it
- Wait a second and when it pops up in the list click the checkbox to enable it
- Note that the list will be filtred by the nmame of the last installed add-on. Just emmpty the search field at the top to se all the add-ons.
Some nice included add-ons we might want to enable
- Copy Attributes Menu (Interface)